RME M-32 Audio Interfaces
Recording Studios 1 through 6 in New Adelphi use the RME M32 AD/DA combination for digital conversion, encoding analogue signal into digital information and back again. Unlike converters you may be used to when using an audio interface at home, where encoding and transfer are often combined, the RME interfaces blindly convert analogue audio into a selection of different digital formats. The process of transferring this digital signal into the computer is handled separately by a selection of additional interfaces. Which ones you use will depend upon your choice of DAW.
REMEMBER: IF YOU ARE EVER UNSURE ABOUT HOW TO USE THE RME ASK AT THE STUDIO OFFICE FOR HELP!
USING THE WRONG SETTINGS CAN COMPLETELY RUIN A WHOLE SESSIONS WORK.
The RME M32s act autonomously so any changes you might need to make, such as changing your sample rate, need to be made on the front panels of the units. Changes will not be carried over to your chosen DAW automatically; these settings need to be made to match. For example, if you want to record in Logic at 44.1kHz, you have to make sure that the sample rate matches both in your Logic project and on the RME converters.
Clocking with the RMEs
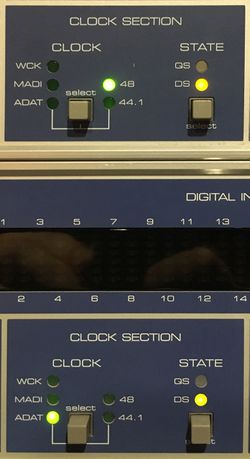
As standard, the RME M32 AD (top unit) acts as a local master clock for each studio, keeping the digital converters and the computer interface in synchronisation with one another. This ensures stability when recording and ensures you avoid any nasty pops and clicks when recording. For the majority of the time this will mean that the AD unit's Clock Section will simply show the sample rate at which you are intending to record, usually 44.1kHz.
Instead of generating a master clock signal locally, you can use the New Adelphi Master Clock by setting the RME M32 AD Clock Section to "WCK", meaning Word Clock. However, this is fixed at a sample rate of 48kHz, so your session must also be configured to run at this rate. There are details as to why the house clock runs at 48kHz on the Master Clock wiki page.
Using the RMEs with Logic
When using Logic with the RMEs, the digital protocol is ADAT. The RMEs send and receive the digital signal between an RME HDSPe 'RayDAT' PCIe card held within a metal chassis (the mysterious black box with the blue light either above or below the RME M32s). This is connected via an extra long optical Thunderbolt cable to the iMac in the recording studio control room.
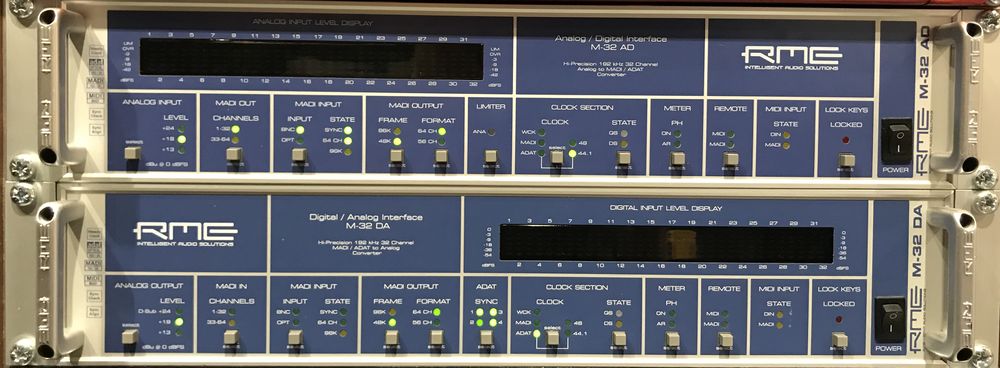
In the image above you can see how the RMEs should look when recording in Logic at 44.1kHz. Unless you wish to experiment with other sample rates, it is most likely that this is how you will be recording into Logic.
The M32 AD (top box) is operating as the master clock in this instance, meaning that the CLOCK SECTION is showing the sample rate being generated and sent to the M32 DA (bottom box). This is the rate at which your Logic session should be configured to run.
The M32 DA (bottom box) handles the conversion of digital audio back into the analogue domain. This requires the most adjustment between different recording setups. Ensure the ADAT input has been selected by pressing the 'select' button in the ADAT section. Also ensure that the CLOCK SECTION of the DA has ADAT chosen by pressing the 'select' button (on the left) until ADAT is selected.
In Logic, your project sample rate should be set to match the one chosen on the M32 AD and select HDSPe RayDAT as your recording interface.
Using the RMEs with Pro Tools Ultimate
When using Pro Tools Ultimate with the RMEs, the digital protocol is MADI, connected over BNC cable. The RMEs send and receive the digital signal between the Avid HD MADI interface, located above the RME M32s, which in turn connect to a Pro Tools Ultimate 'HDX' PCIe card held within the same metal chassis as the 'RayDAT' card mentioned above. Again, this is connected via an extra long optical Thunderbolt cable to the iMac in the recording studio control room.
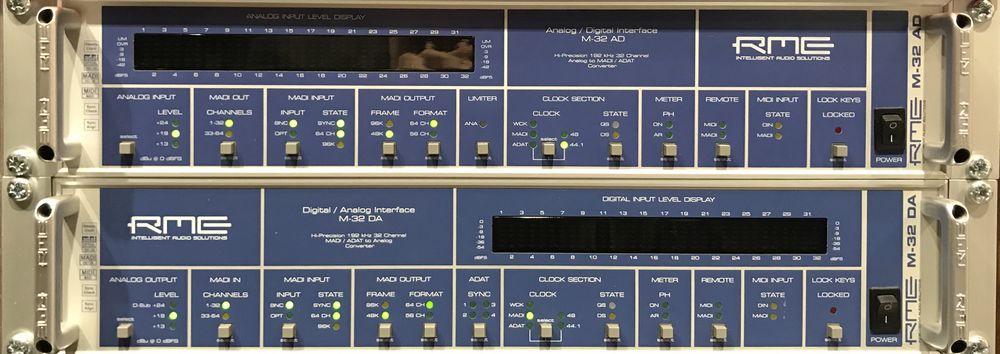
In the image above you can see how the RMEs should look when recording in Pro Tools Ultimate at 44.1kHz. Remember that you cannot change your sample rate after you have started a new project in Pro Tools, so make sure you choose the correct rate at the beginning of your session.
The M32 AD (top box) is operating as the master clock in this instance, meaning that the CLOCK SECTION is showing the sample rate being generated and sent to the M32 DA (bottom box). This is the rate at which your Pro Tools session should be configured to run.
The M32 DA (bottom box) handles the conversion of digital audio back into the analogue domain. This requires the most adjustment between different recording setups. First, switch off the synchronisation to ADAT using the 'select' button in the ADAT section; the four SYNC lights should switch off and you can now configure the MADI INPUT settings. Ensure the BNC MADI input has been selected by pressing the 'select' button in the MADI INPUT section. Then ensure that the CLOCK SECTION of the DA has MADI chosen by pressing the 'select' button (on the left) until MADI is selected.
If you are using sample rates higher than 48kHz then you may need to adjust the clock "state". Please see below for more details on advanced configurations.
Using the RMEs with Your Own Laptop
The recording studios were designed to allow you to use your own laptop instead of the provided iMac should you wish. To do this, you must use the RME MADIface interface by connecting your laptop to the USB port labelled MADIFACE on the control room Connectivity Panel. This provides 64 simultaneous input and output channels between your laptop and the RME M32 converters, giving 128 channels of audio over standard USB 2.0.
To use the MADIface interface you need to install the free driver from the RME website. Look for 'MADIface XT / USB / Pro' in the downloads and install the correct version for your Mac or Windows system. Linux systems using ALSA v1.1 and above should work with no additional driver.
When using your own laptop with the RMEs, the digital protocol is MADI, connected over optical fibre. The settings are very similar to the Pro Tools configuration described previously.
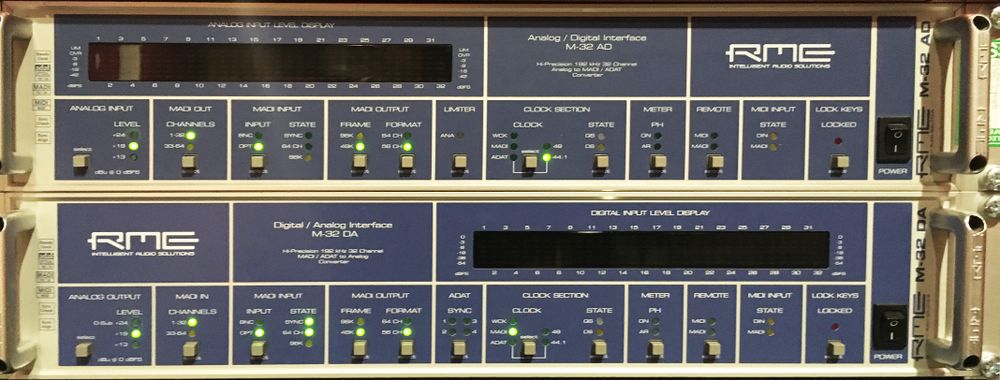
In the image above you can see how the RMEs should look when recording to your own laptop at 44.1kHz. You will also need to ensure that the MADIface configuration matches the M32s using the "Fireface Settings" window which appears upon connecting the MADIface to your computer.
The M32 AD (top box) is operating as the master clock in this instance, meaning that the CLOCK SECTION is showing the sample rate being generated and sent to the M32 DA (bottom box). This is the rate at which your DAW should be configured to run.
The M32 DA (bottom box) handles the conversion of digital audio back into the analogue domain. This requires the most adjustment between different recording setups. First, switch off the synchronisation to ADAT using the 'select' button in the ADAT section; the four SYNC lights should switch off and you can now configure the MADI INPUT settings. Ensure the OPT MADI input has been chosen by pressing the 'select' button in the MADI INPUT section. Then ensure that the CLOCK SECTION of the DA has MADI chosen by pressing the 'select' button (on the left) until MADI is selected.
If you are using sample rates higher than 48kHz then you may need to adjust the clock "state". Please see below for more details on advanced configurations.
Using Different Sample Rates
Once you have set the RME M32s to the correct settings for your chosen DAW you may wish to work in a different sample rate than the standard 44.1khz. The RME M32s offer conversion capabilities of up to 192khz however the most common alternative you might find yourself using is 48khz.

The RME M32 AD (the top unit) should always read the sample rate that you intend to work in, it does this through a combination of two different settings, the "clock" on the top unit should read as either 44.1khz or 48khz and the "state" should either be unlit, be set to DS (double speed) or QS (quadruple speed). The combination of these two is your resultant clock speed, for example 48khz at double speed results in a sample rate of 96khz.
The bottom unit should have the appropriate "clock" source selected such as "ADAT" if you are working with Logic or Madi if using Protools or the Madiface. The "state" however should always follow whatever you have selected on the top unit.
The table below shows the full options for different sample rate selection.
| Sample Rate | M32 AD "clock" | M32 AD "state" |
|---|---|---|
| 44.1khz | 44.1 | Off |
| 48khz | 48 | Off |
| 88.2khz | 44.1 | DS |
| 96khz | 48 | DS |
| 176.4khz | 44.1 | QS |
| 192khz | 48 | QS |
Total Mix
Total Mix is the software provided by RME to manage the routing of your outputs and inputs, it allows us to listen back to audio post conversion on the long faders of the desk with almost no latency whilst recording audio on the short faders. It also lets us decide where we might want to route out DAW outputs, so if you were working on a desk with fewer channels you could potentially combine signals to double up on each channel.
You do not need to worry about most of this as in the recording studios two default settings have been added for ease of use with everything routed how one might expect it to be. The two presets available are "Record" and "Mix", you will see these on the righthand side when opening Total Mix. It's important to make sure you use these appropriately when you are in your studio session, if ever you find nothing being routed into the computer is coming back on the long faders then it is very likely Total Mix is in "Mix" mode, switch to record mode and this problem will be solved. Likewise if you are planning to do a large mix across the desk or do any routing out of your chosen DAW to the outboard gear in the studio it is important to use "Mix" mode as using the "Record" preset in this scenario can result in nasty (and potentially dangerous) feedback loops.
If you are using the Madiface feel free to ask a member of the recording studios staff to check that your Total Mix is set up correctly.


